Task Orchestration
Task Orchestration
Task orchestration through tools like Crontab or Windows Task Scheduler is useful for automating routine processes and managing system tasks.
These tools enable users to schedule scripts and other workloads to run automatically at specified times (such as automatic program updates). By automating these tasks, users can ensure critical operations are performed consistently without manual intervention, reducing the risk of human error and freeing up valuable time in both personal and professional environments.
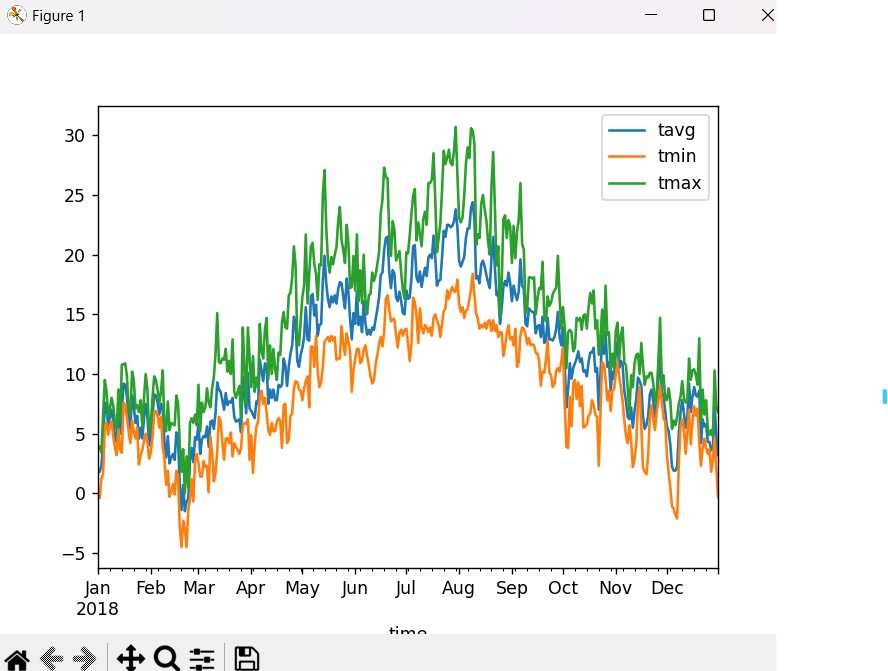
In this article, we will use crontab to autorun the sample meteostat script - which visualizes weather data.
![]()
For Linux
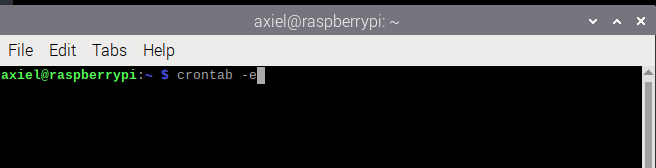
1. Open Terminal
Crontab can be accessed via the terminal using crontab -e to open the crontab menu.
2. Edit Crontab
If doing this for the first time, there’ll be a prompted to select the menu.
Select an editor. To change later, run 'select-editor'.
 1. /bin/nano <---- easiest
 2. /usr/bin/vim.basic
 3. /usr/bin/vim.tiny
 4. /bin/ed

Choose 1-4 [1]:
Enter 1 to choose /bin/nano.
Once crontab is set to open with nano, we can pass crontab – e again to view the editor. Scroll to the bottom of the comments and you will be able to set a regular interval and the path to your file.
3. Add a Cron Job
The five asterisks represent time and date fields:
“*” (minute) - 0-59
“*” (hour) - 0-23
“*” (day of the month) - 1-31
“*” (month) - 1-12
“*” (day of the week) - 0-7 (0 and 7 both represent Sunday)
So, for example
5 10 * * 3 python "/home/Notebook_Projects/WeatherData.py"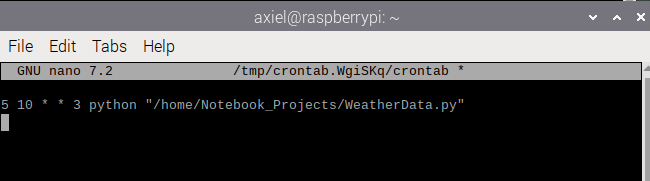
The above means that the program at /home/Notebook_Projects/WeatherData.py will be run at 10:05am on every Wednesday (so long as the device is powered on). You can check the correct time using the crontab.guru service. You can find the copy the path from the file explorer.
4. Save and Exit
If you’re using nano, save your changes by pressing CTRL + X, then Y to confirm, and Enter to save.
5. Verify Cron Jobs
To view the current list of cron jobs for the user, use crontab -l from the terminal
For Windows
To autorun a python file from Windows, you will need a batch file to pass the command automatically into a terminal. In this example, we will use the meteostat demo to visualize max, min and avg temperature.
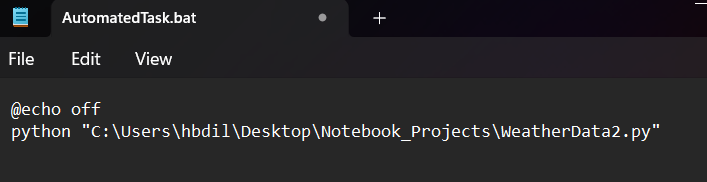
1. Create a Batch File
- Open Notepad to write your Batch Script. Pass the path of your py file to the python command to execute the file. For example, let’s create a batch file that downloads weather data:
python "C:\Users\User1\Desktop\Notebook_Projects\WeatherData.py"2. Save the Batch File:
Go to File -> Save As. In the Save as type dropdown, select All Files. Name the file with a .bat extension, for example, AutomatedTask.bat. Save it to a location of your choice. You will need to navigate to it later.
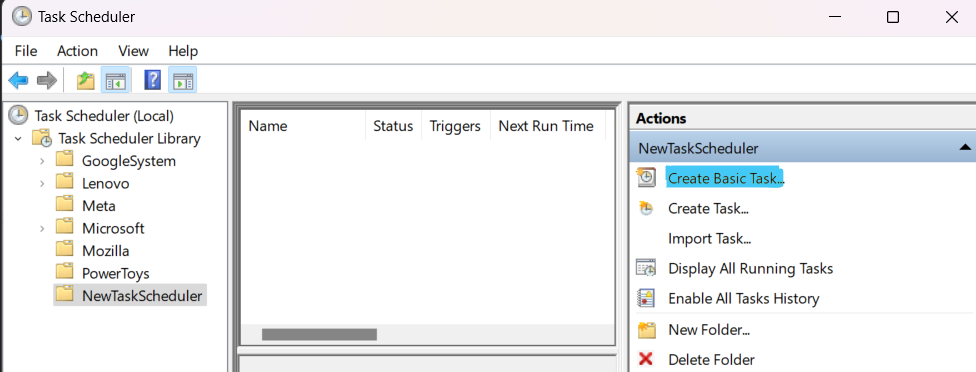
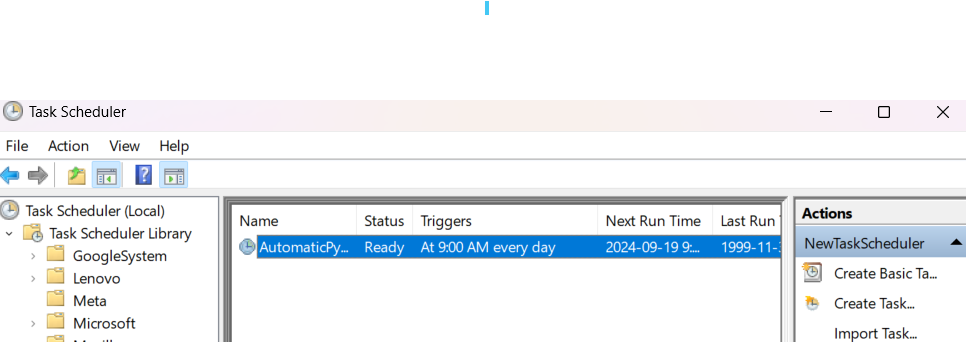
3. Schedule the Batch File with Task Scheduler
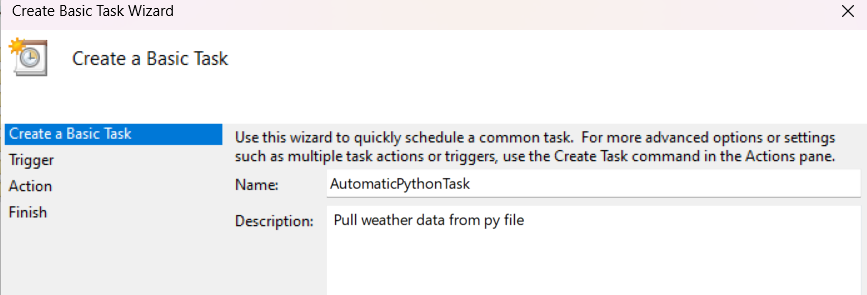
Open Task Scheduler and in the right-hand pane, click on Create Basic Task. Name and describe Your Task
Give your task a name, like “Automatic Python Task”, and add a description if desired.
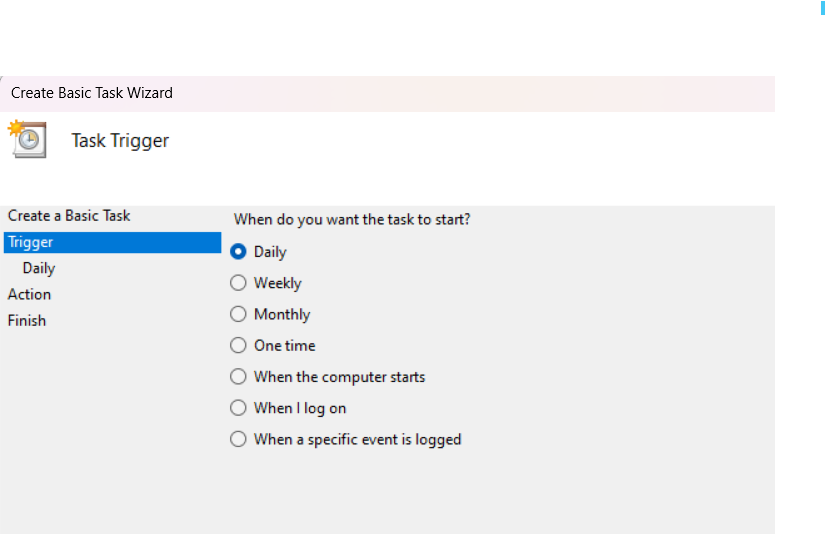
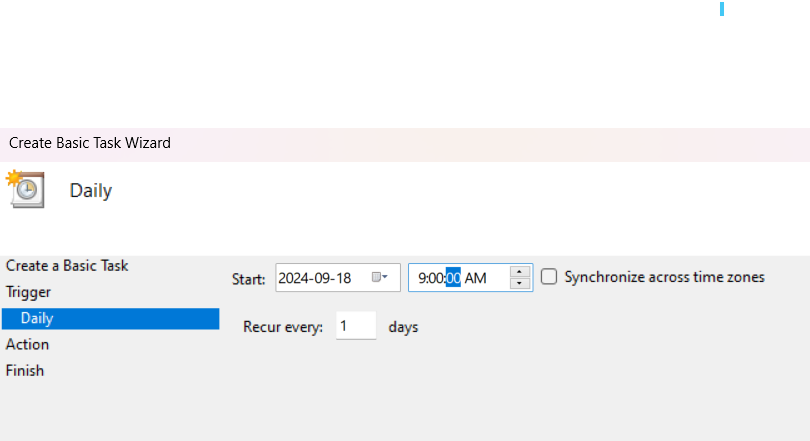
Set the Trigger. Choose when you want the task to start. For example, select Daily if you want it to run every day. Click Next, and then set the start date and time.
4. Choose the Action:
Select Start a program and click Next. Specify the batch file by navigating to the location of your batch file (C:_Projects.bat.). 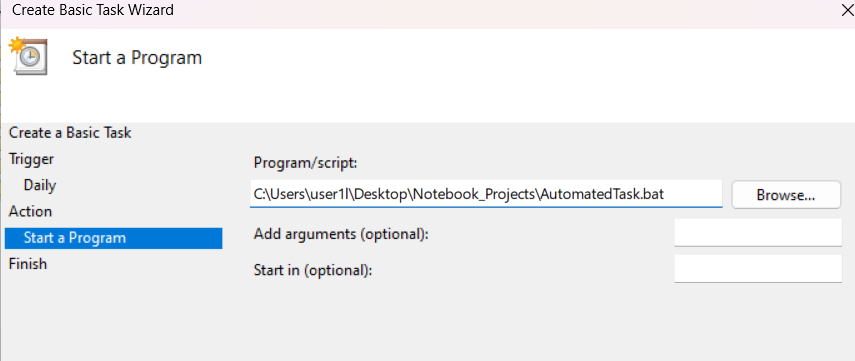
5. Finish the Task:
Review your settings and click Finish to create the task.
Check Task Scheduler - your new task will be in the same folder as you had previously stored it.
Run the Task Manually (Optional): Right-click the task and select Run to test if it executes as expected.
Additional Tips
Running as Administrator: If your script requires administrative privileges, you may need to configure the task to run with the highest privileges. This can be done in the task’s properties under the General tab by checking Run with highest privileges.